On any Windows computer, you can enable Remote Desktop connecting using the Powershell command directive. The intent behind enabling Remote Desktop connections is to allow remote access to your computer.
This will mean that you can access your computer over RDP if a remote desktop is enabled on the computer. Remember, enabling a remote desktop means that you are allowing your local computer to be accessed from a remote location. This is assuming that firewall rules are in place to allow Remote desktop connections.
Before giving you the Powershell command to enable Remote desktop connections on your local computer, we will need to ensure the following:
- RDP uses port 3389 for remote access. If you have a firewall in your network, you will need to modify the firewall rules to open port 3389 for remote access from a location outside your network
- Remote access users must have privileges to access the computer over the Remote desktop. In other words, the remote user must be assigned to a group that has privileges to access the system resources including files, folders, and other resources on the target computer.
Once you have enabled firewall port 3389 for two-way communication between the local computer and the remote user, you can give the following Powershell directive on a Powershell command window.
You can enable Remote desktop only from a Powershell window with ‘Administrative’ privileges.
The brief steps or process to enable Remote desktop is as follows:
- Enable firewall port 3389 for remote access through the Remote Desktop Protocol.
- Launch Powershell with administrative privileges on the computer
- Execute the Powershell command directive to enable Remote desktop connections on the local computer
We will implement this process below and share the Powershell command directive that can be used to enable Remote desktop on a computer.
The steps below can be used to enable Remote desktop connections on a Windows 10 or Windows 11 or any other Windows computer (including the servers).
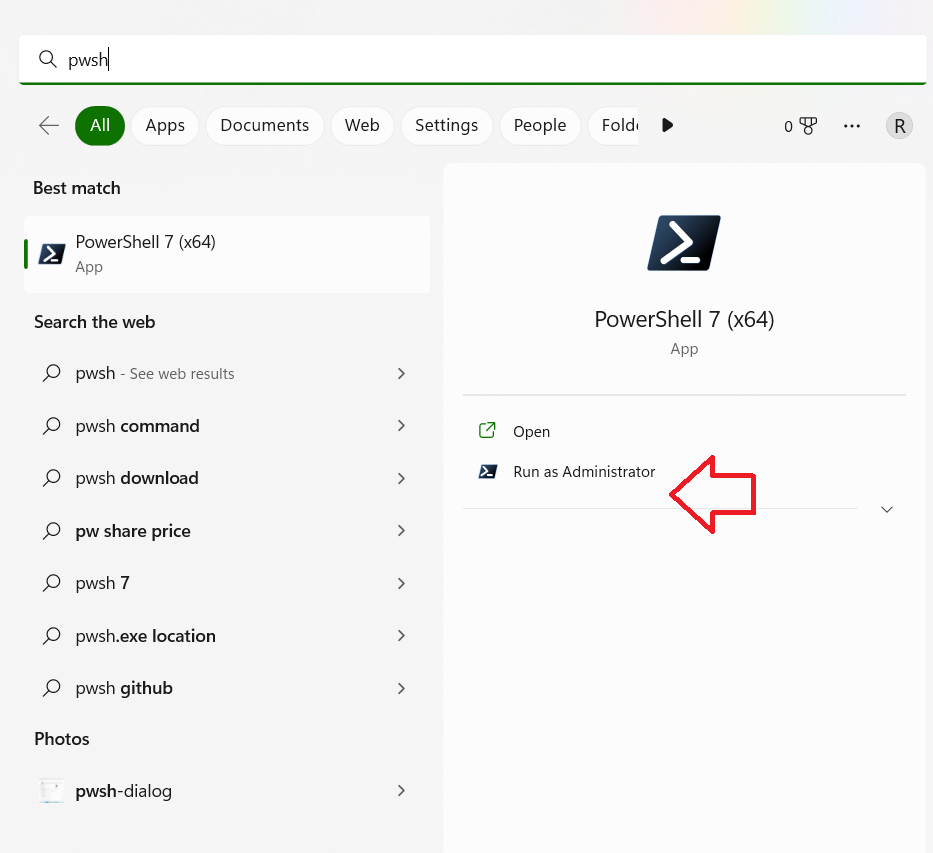
Launch Powershell on Windows 11 computer using the pwsh command directive. Do ensure that you launch the Powershell program with ‘Administrative privileges’. You can launch Powershell using the pwsh command on the search box of the Windows computer.
The screenshot below shows the pwsh command directive with an option to launch Powershell with administrative privileges.

Once the Powershell session is launched, we will need to use the following Powershell directive to enable Remote desktop connections on a local computer.
Set-ItemProperty -Path ‘HKLM:\System\CurrentControlSet\Control\Terminal Server’ -name “fDenyTSConnections” -value 0
This command directive will enable Remote Desktop connections on the local computer.
If you have a software firewall or Microsoft firewall on the local computer, you may also need to enable Remote desktop connections through the firewall. You can enable the Microsoft firewall rule to allow Remote desktop connections using the following Powershell directive:
Enable-NetFirewallRule -DisplayGroup “Remote Desktop”
The screenshot below contains two Powershell directives. The first one enables Remote desktop connections, and the second one prepares the Microsoft firewall to allow Remote desktop connections.

There is no command output from these two commands. If there is no error, you get no response from the commands. This implies that the Remote desktop connections have been enabled on the local computer.
The best part about this is that you can disable Remote desktop connections on the local computer anytime using another Powershell directive.
So, to disable Remote desktop connections using Powershell, we will use the following Powershell directive:
Set-ItemProperty -Path ‘HKLM:\System\CurrentControlSet\Control\Terminal Server’ -name “fDenyTSConnections” -value 1
This Powershell command directive disables Remote desktop connections on the local computer.
You can notice from both Powershell command directives that we are essentially playing with a Registry entry that is under the HKLM:\System\CurrentControlSet\Control\Terminal Server hive.
The registry value for fDenyTSconnections is toggled to 0 to enable Remote desktop connections. And the same registry entry for fDenyTSconnections is set to 1 to disable remote desktop connections.
After disabling the Remote desktop connections, it is wise to clear the firewall rules as well. So, we will disable the firewall rules for the Remote desktop using the following Powershell command directive on a Windows computer:
Disable-NetFirewallRule -DisplayGroup “Remote Desktop”
Summary
We have used Powershell command directives to enable or disable remote desktop connections on a local computer. We have also seen how we can enable Microsoft’s firewall to allow remote connections to the local computer.
As and when you decide to disable Remote desktop connections on the local computer, please make sure that you have made a corresponding change on the firewall as well.
Rajesh Dhawan is a technology professional who loves to blog about smart wearables, Cloud computing and Microsoft technologies. He loves to break complex problems into manageable chunks of meaningful information.